Docs Pricing

What's new in Graphext?

Page 1Next
February 27, 2026

Apify Dataset Preview, Add Data from Project View, JSON Extraction and more...

🌟 New Features

Preview Apify Datasets Before Importing

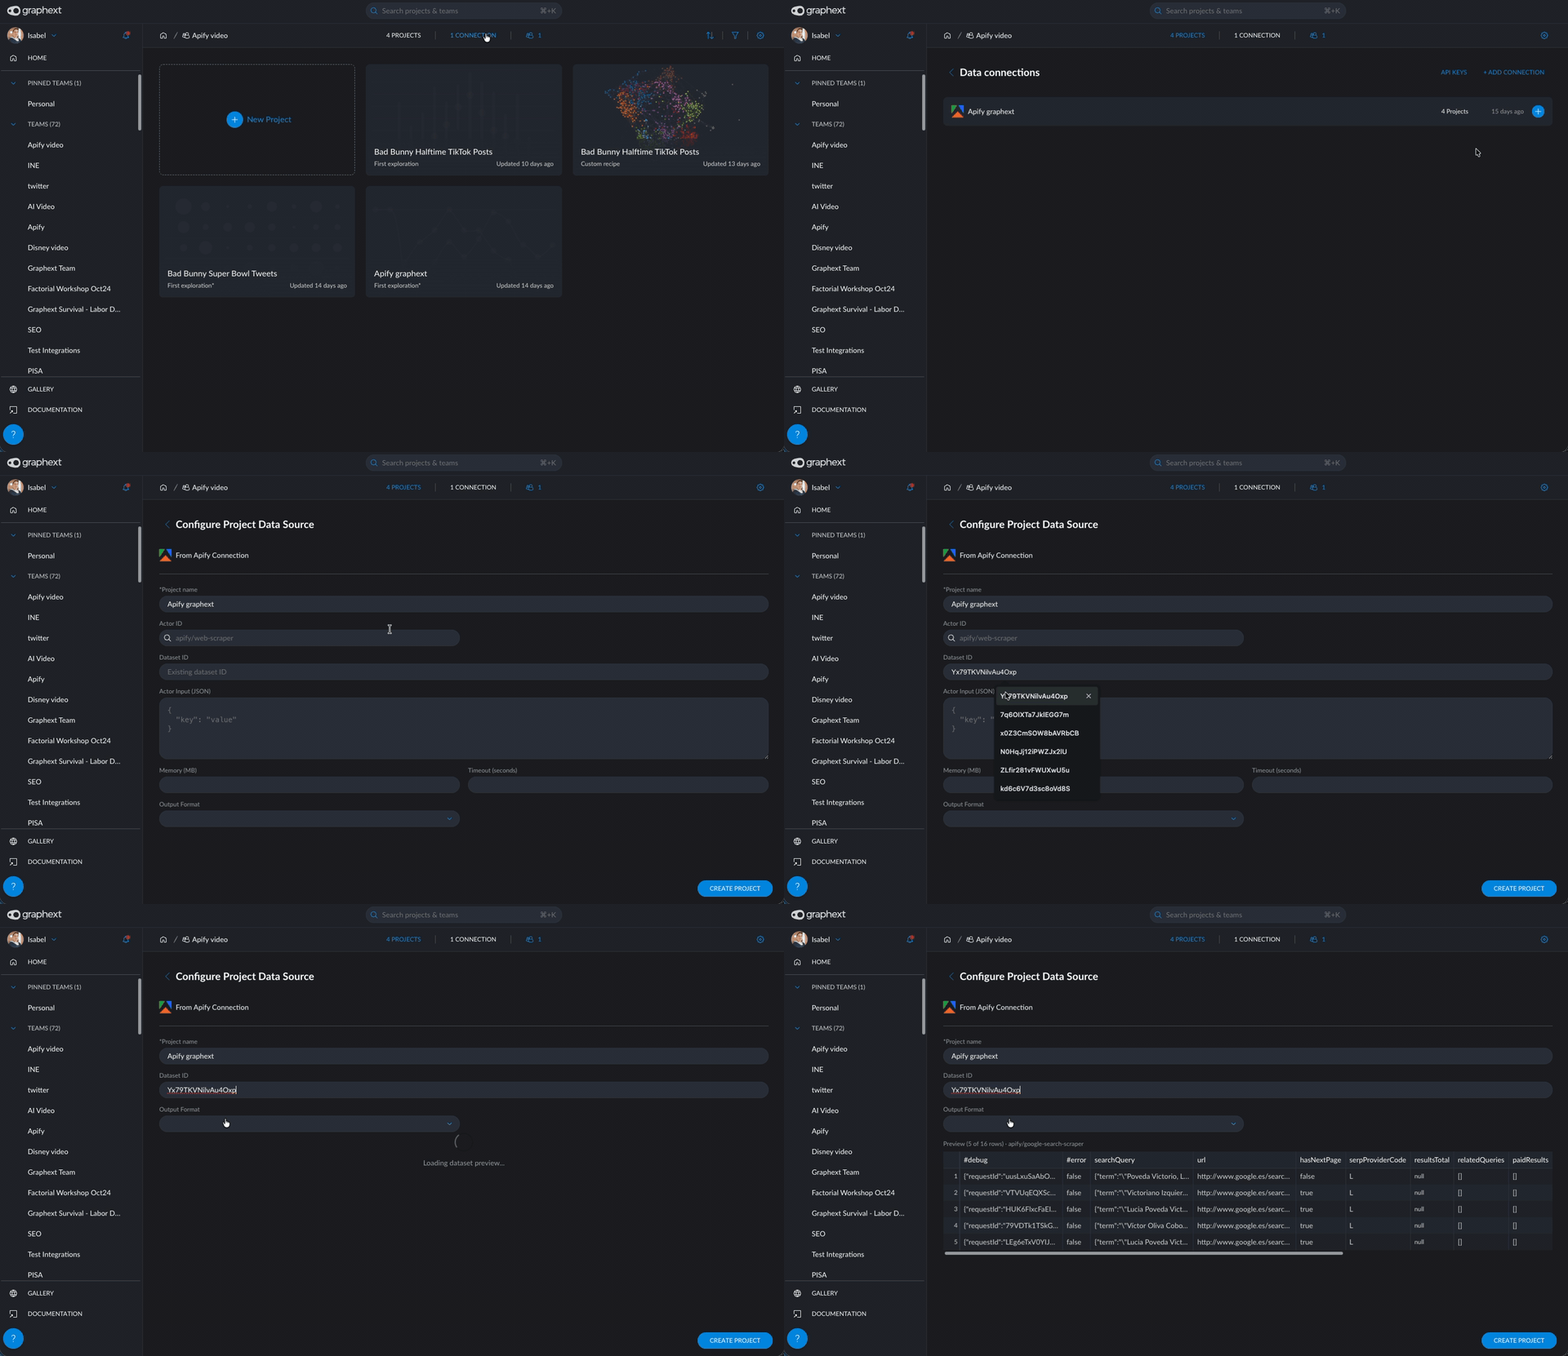
You can now preview the contents of an Apify dataset before importing it into Graphext. When creating a project from an existing Apify dataset or adding one to a project, entering the dataset ID automatically fetches sample rows and detects the column schema — so you can see exactly what data you're getting and adjust column names and types before committing. No more blind imports.
How can I start using it?

  • Create a new project from Apify or add a dataset to an existing one
  • Choose the "Existing dataset" option and paste the dataset ID
  • The preview loads automatically — review the sample data and column types
  • Adjust any column names or types if needed, then import

Add Apify Data Directly from a Project

You no longer need to edit the recipe manually to bring in Apify data. From the project top bar, click the dataset selector and use the "+" button to open the Apify dataset modal. From there you can either run an Apify actor to collect new data or fetch an existing dataset — all without leaving your project. This also makes it easy to add more data to an ongoing analysis: just add another dataset from Apify and it appears as a new dataset in your project.

How can I start using it?

  • Open any project and click the dataset selector in the top bar
  • Click the "+" button (visible when you have an Apify integration configured)
  • Choose to run an actor or fetch an existing dataset
  • Configure the columns and click Save — the new dataset appears in the selector

Extract Values from JSON Columns

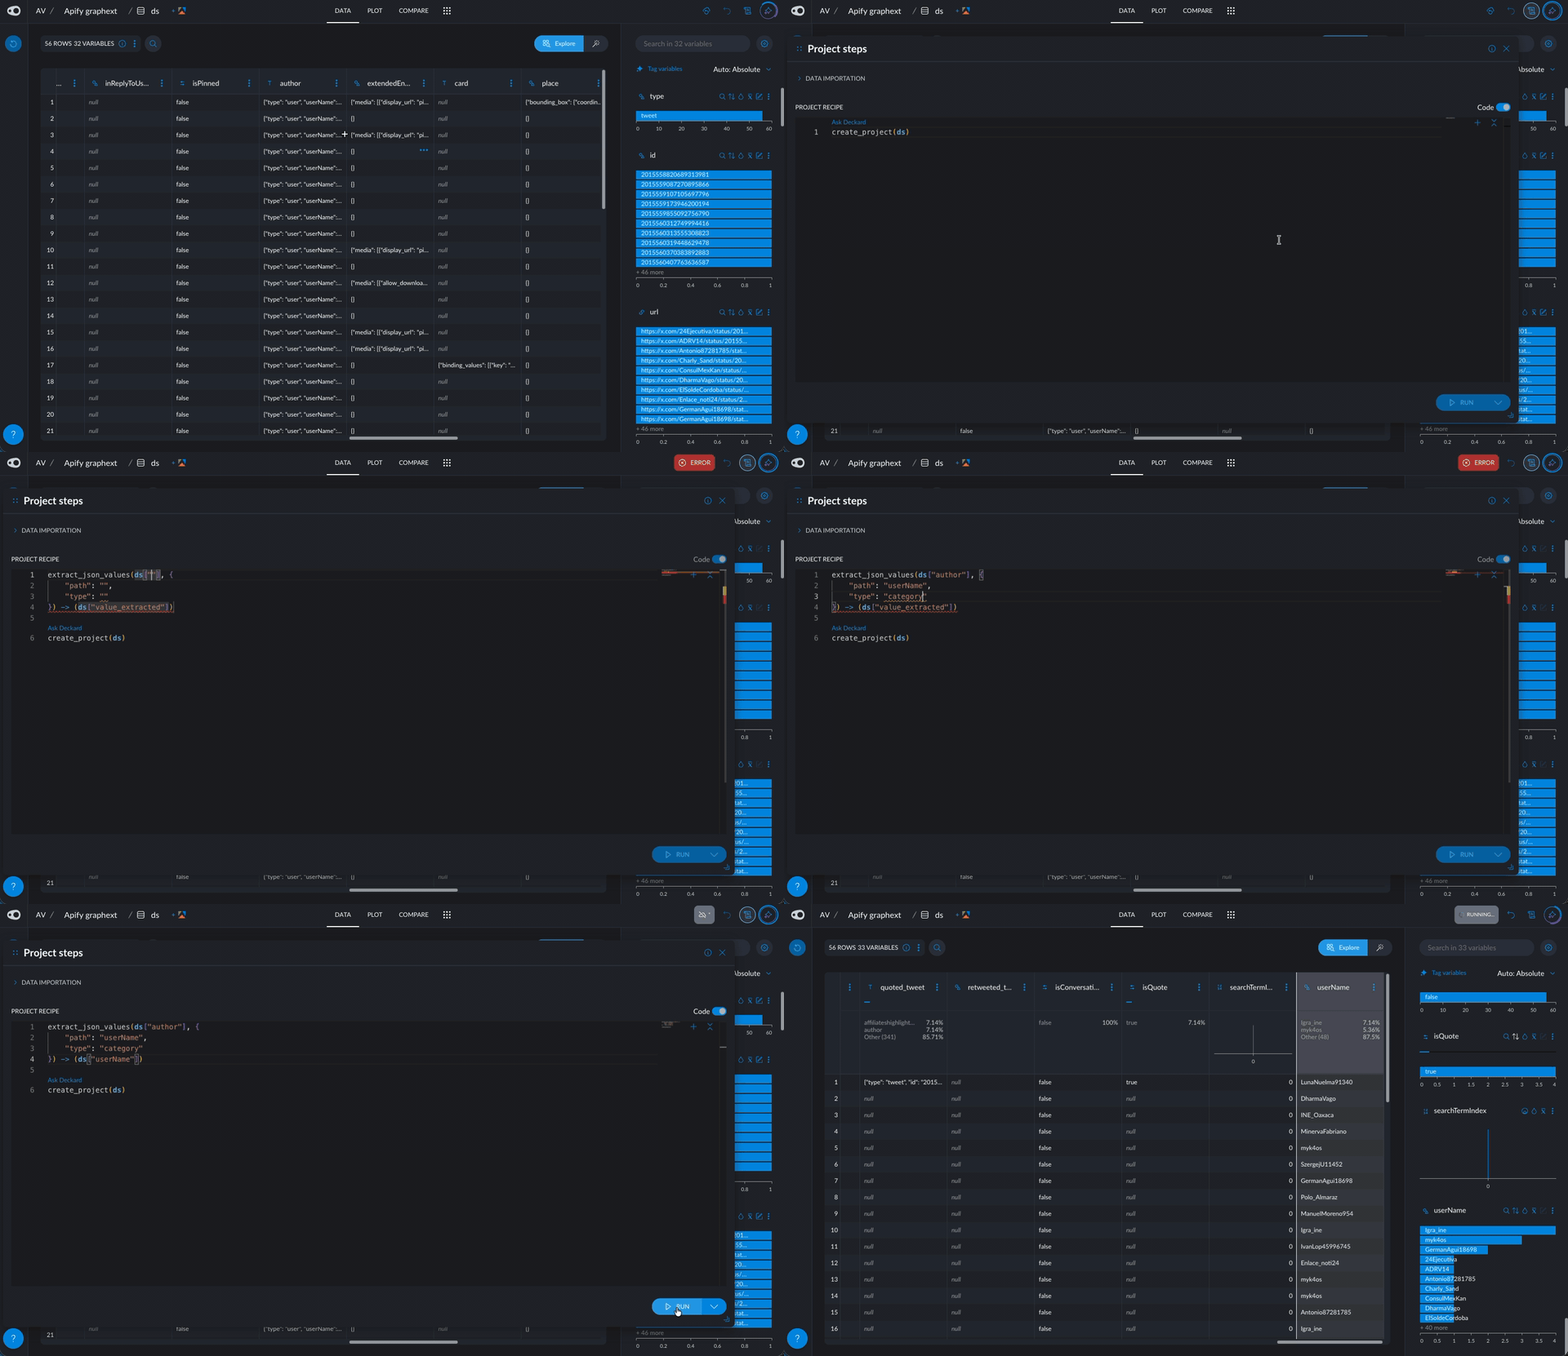
Datasets imported from APIs, web scrapers, or databases often contain columns with nested JSON objects — for example, an author column from a Twitter scrape that contains nested fields like name, followers, verified, and more. You can now use the extract_json_values step to pull out any nested field using a simple path expression (like author.name or address.city), turning buried data into clean, usable columns for analysis.
How can I start using it?

  • Open the recipe editor on a project that has a JSON column
  • Add the extract_json_values step
  • Set the path parameter to the field you want (e.g., author.name, prices[0], metadata.tags)
  • Choose the output type (text, number, category, date, etc.)
  • Execute — the extracted values appear as a new column

Heatmap: Pair Values by Position

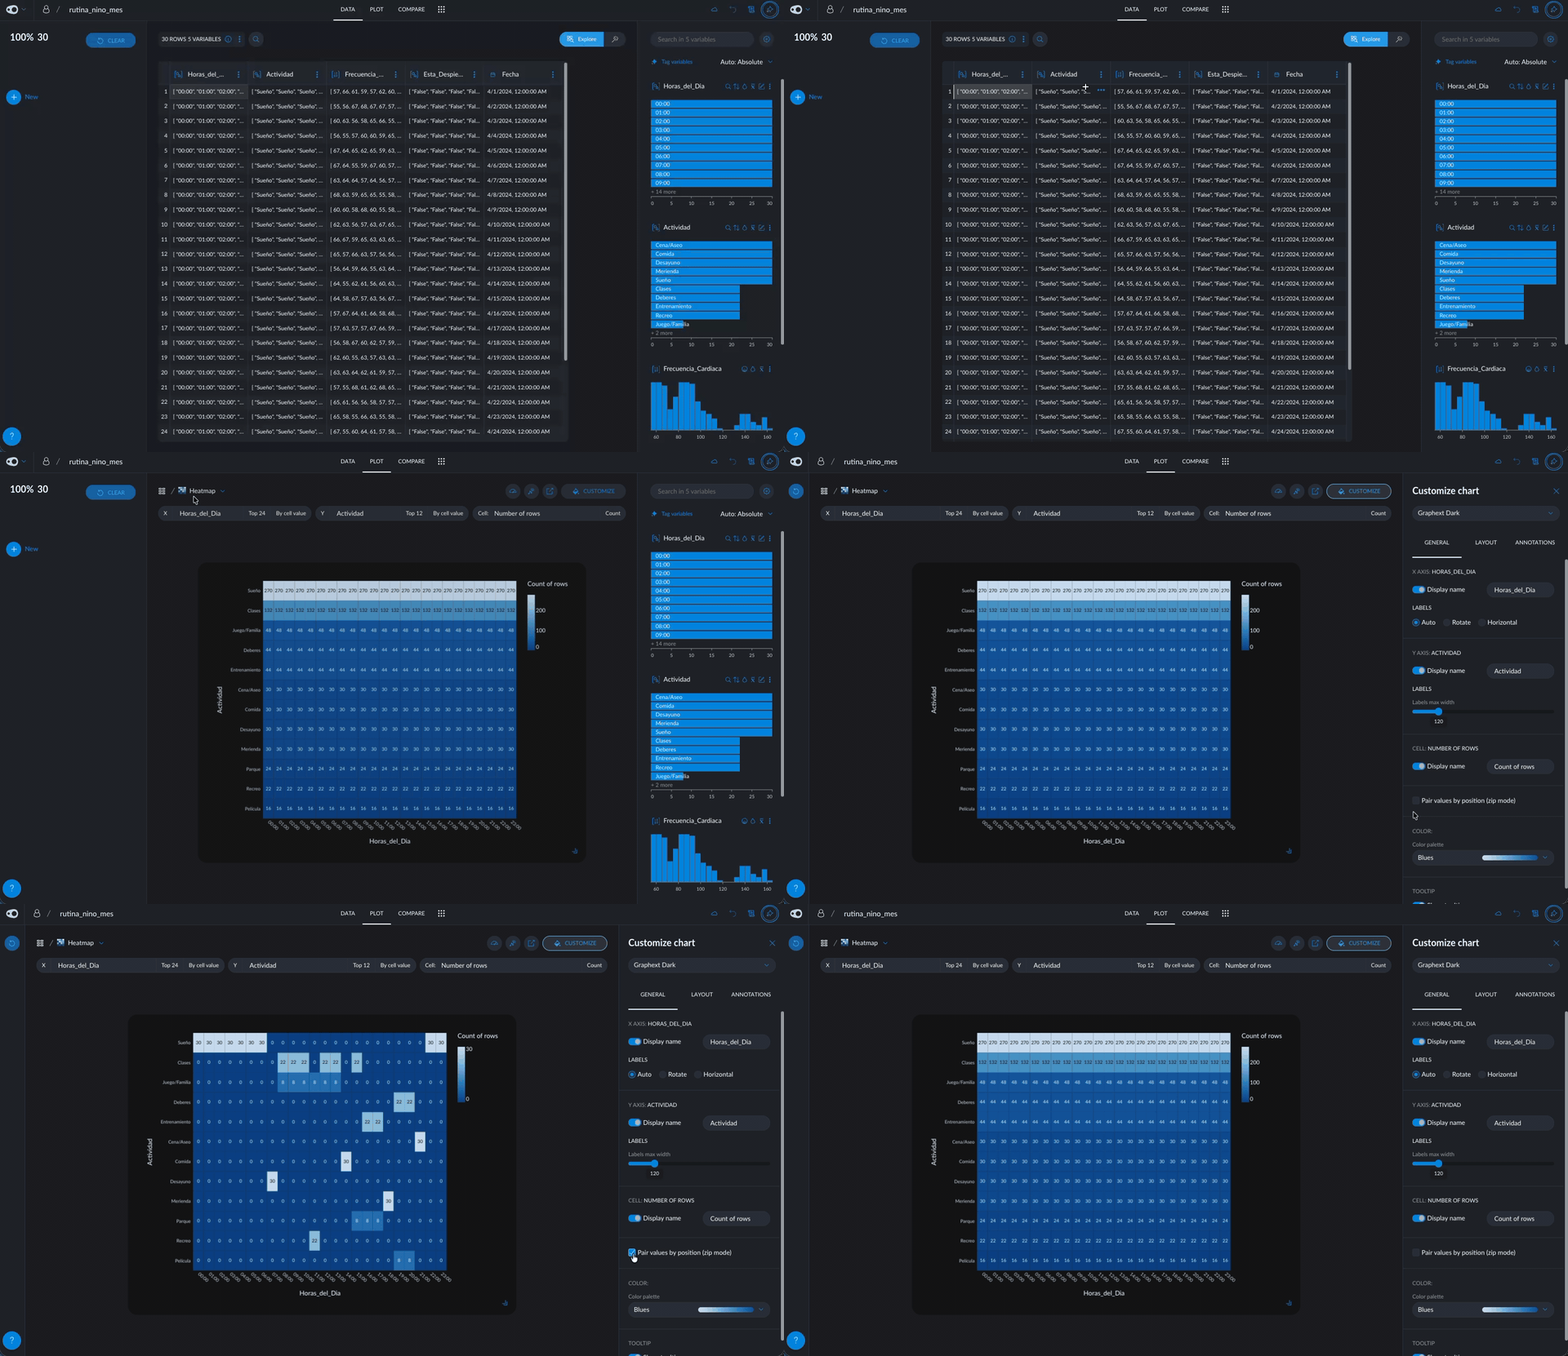
When creating a heatmap with two multivalued columns (columns that contain lists of values), you can now choose how to combine them. The new "Pair values by position" toggle (zip mode) matches values by their index instead of creating every possible combination. This is especially useful for columns that are naturally paired, like survey questions and their corresponding answers.
Improvements

Smarter Apify Data Recovery

When an Apify actor run is aborted or times out before completing, Graphext now recovers whatever data was collected up to that point instead of failing entirely. If an actor was scraping 1,000 pages and timed out at 600, you'll get those 600 results with a warning — no data is lost.

Graphext AI: Recipe Diff View

When the AI modifies your recipe, you can now see exactly what changed. Each "Apply Recipe" action in the AI conversation includes an expandable diff view showing added, removed, and modified steps side by side — so you always know what the AI did before moving forward.

Graphext AI: Proactive Charts

The AI now proactively creates charts alongside its text responses. When it analyzes a column or answers a question about your data, it automatically builds and configures the most relevant visualization — no need to ask for it separately.

AI Data Processing Consent

A new consent management flow lets you review and accept AI data processing terms before using Graphext AI features. Your consent status is visible in Account Settings, where you can change your decision at any time.

Improved Google Sheets Import

Importing data from Google Sheets now correctly handles both CSV and XLSX files, resolving issues where certain spreadsheet formats would fail during download.

Security & Platform Updates

We've updated core platform dependencies to their latest versions for improved security, performance, and stability:

  • Updated UI framework and component library for better accessibility and rendering performance
  • Upgraded error monitoring and observability tools with AI-specific instrumentation
  • Updated state management library to the latest major version
  • Refreshed build tooling, linting, and testing frameworks
  • Applied security patches across all backend services and dependencies
  • Updated data engine and processing infrastructure

February 18, 2026

Graphext AI Redesign, Apify Integration, New Recipe Steps and more...

🌟 New Features

Graphext AI: Your Proactive Data Analyst

Graphext AI has been completely redesigned. It no longer waits for you to ask — it starts working the moment you open a project.

Proactive analysis on project open. As soon as you open a project, the AI analyzes your dataset automatically — checking every column for data quality issues, identifying uninformative fields, and suggesting the most relevant analyses based on your data. You'll see the AI button pulse when it has something to share.

Interactive chat that controls the entire interface. Ask questions in natural language and the AI doesn't just answer — it navigates between sections, creates and configures charts, applies filters, and builds visualizations to support its responses. Every action it takes is visible and expandable, so you can verify exactly what it did.

From raw data to strategy in a conversation. Whether you need topic extraction, sentiment analysis, engagement breakdowns, or strategic recommendations, the AI builds on each answer to drive the analysis forward — proposing next steps, drilling deeper, and connecting insights to your goals.

How can I start using it?

  • Open any project and click the AI button in the top-right corner
  • The AI will have already analyzed your dataset — review its suggestions
  • Ask questions, request analyses, or tell it your goal and let it guide the exploration

Apify Integration

  • Apify Integration. We've integrated Graphext with Apify, the web scraping and automation platform with 10,000+ pre-built scrapers. You can now create projects by running any Apify actor (social media scrapers, review extractors, news crawlers, and more) or by importing an existing Apify dataset — data flows directly into Graphext with no intermediate files or format conversions. To get started, add your Apify API token as a new integration in your account settings.

How can I start using it?

  • Go to your account settings and add a new Apify integration
  • Enter your Apify API token (you can find it in your Apify account)
  • Once connected, Apify will be available as a data source when creating new projects
  • Built-in Apify Actor Search. Browse the Apify Store without leaving Graphext. Click the wand icon next to the actor field to open a search panel — results show the actor's description, how many users run it, its pricing model, and more. No more switching tabs to find the right scraper for your use case.
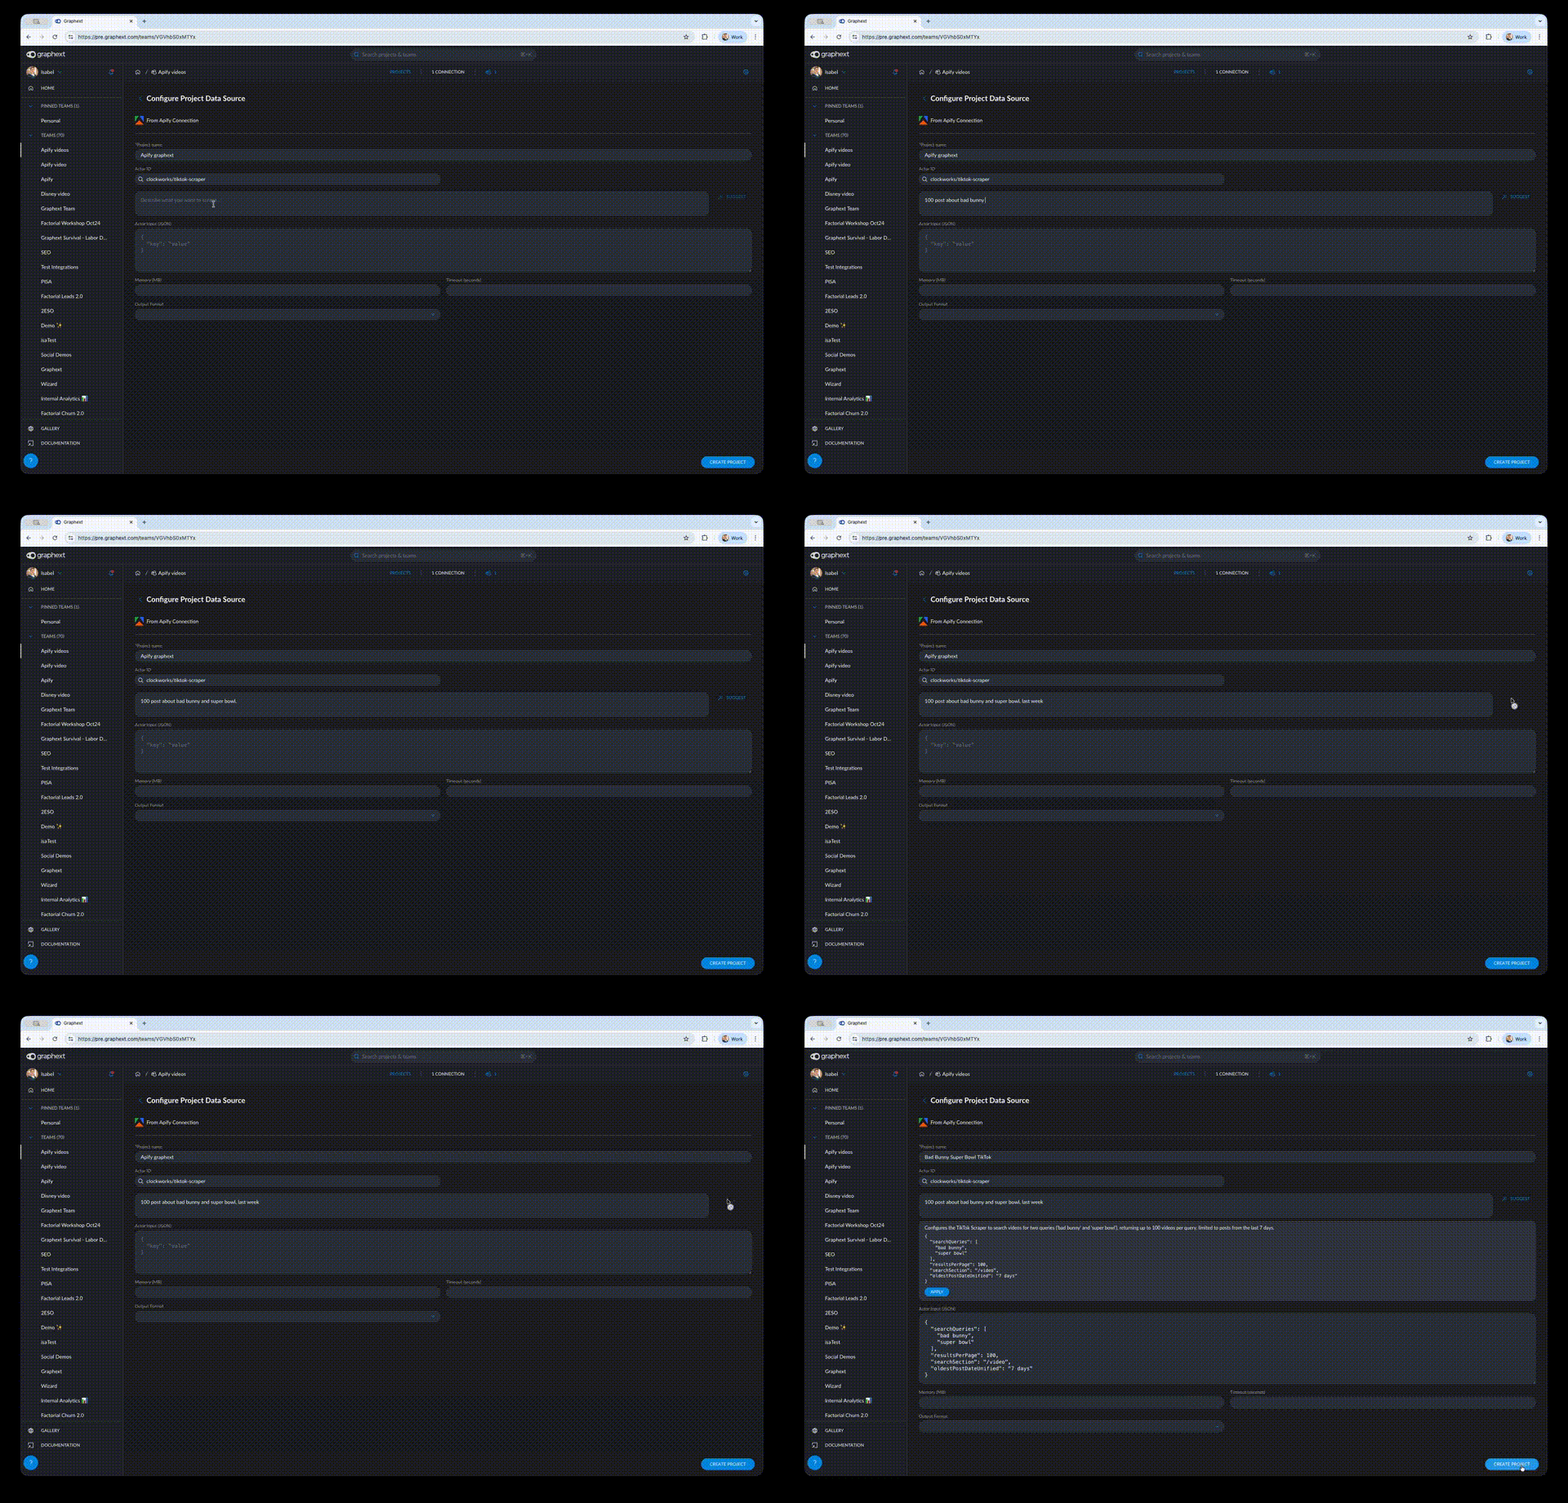
  • AI-Powered Actor Configuration. Every Apify actor has a different input schema with different parameters. Instead of reading actor documentation to figure out the right JSON, describe what you want in plain language — for example, "Get the latest 500 TikTok posts about Bad Bunny's Super Bowl halftime show, including captions, likes, shares, and comments". The AI reads the actor's schema and docs, then generates a ready-to-use JSON configuration, an explanation of what it set up, and a suggested project name to keep your workspace organized. You can review everything before applying, and edit the project name if you prefer something different.

How can I start using it?

  • When creating a project from Apify, search and select an actor
  • In the description field below the JSON editor, write what you want to scrape in plain language
  • Click Suggest — the AI generates the configuration, an explanation, and a project name
  • Review, adjust if needed, and click Apply
  • Import Existing Apify Datasets. Already have data in Apify from a previous or scheduled actor run? You can now create a project by connecting directly to a dataset by its ID, mapping the output columns you need, and importing. This is especially useful when you've been collecting data over time with scheduled actor runs and want to analyze the accumulated results without re-running the scraper.

How can I start using it?

  • Create a new project and select Apify as the data source
  • Choose the existing dataset option and paste the dataset ID from your Apify console
  • Map the output columns and create the project
  • New Recipe Step: run_apify_actor. Execute any Apify actor directly from your recipe as a pipeline step. Search for an actor, configure it with the AI assistant, define the output columns, and add it to your recipe. The actor runs during project execution and the results feed into the rest of your pipeline — making it possible to combine data from multiple platforms or sources in a single project without leaving Graphext.

How can I start using it?

  • Open the recipe editor on any project
  • Add a new step and select run_apify_actor
  • Search for an actor using the built-in store search
  • Use the AI assistant to configure the actor parameters and define the output columns
  • Execute the recipe — the actor runs and the data is incorporated into your project
  • New Recipe Step: fetch_apify_dataset. Pull data from any existing dataset in your Apify account into a running project. Add it as a recipe step, point it to a dataset ID, and map the columns. When you have scheduled actors collecting data periodically, this step lets you incorporate the latest batch into an ongoing analysis without creating a new project.

How can I start using it?

  • Open the recipe editor on any project
  • Add a new step and select fetch_apify_dataset
  • Enter the Apify dataset ID and map the output columns
  • Execute the recipe to import the data into your project

🛠️ Improvements

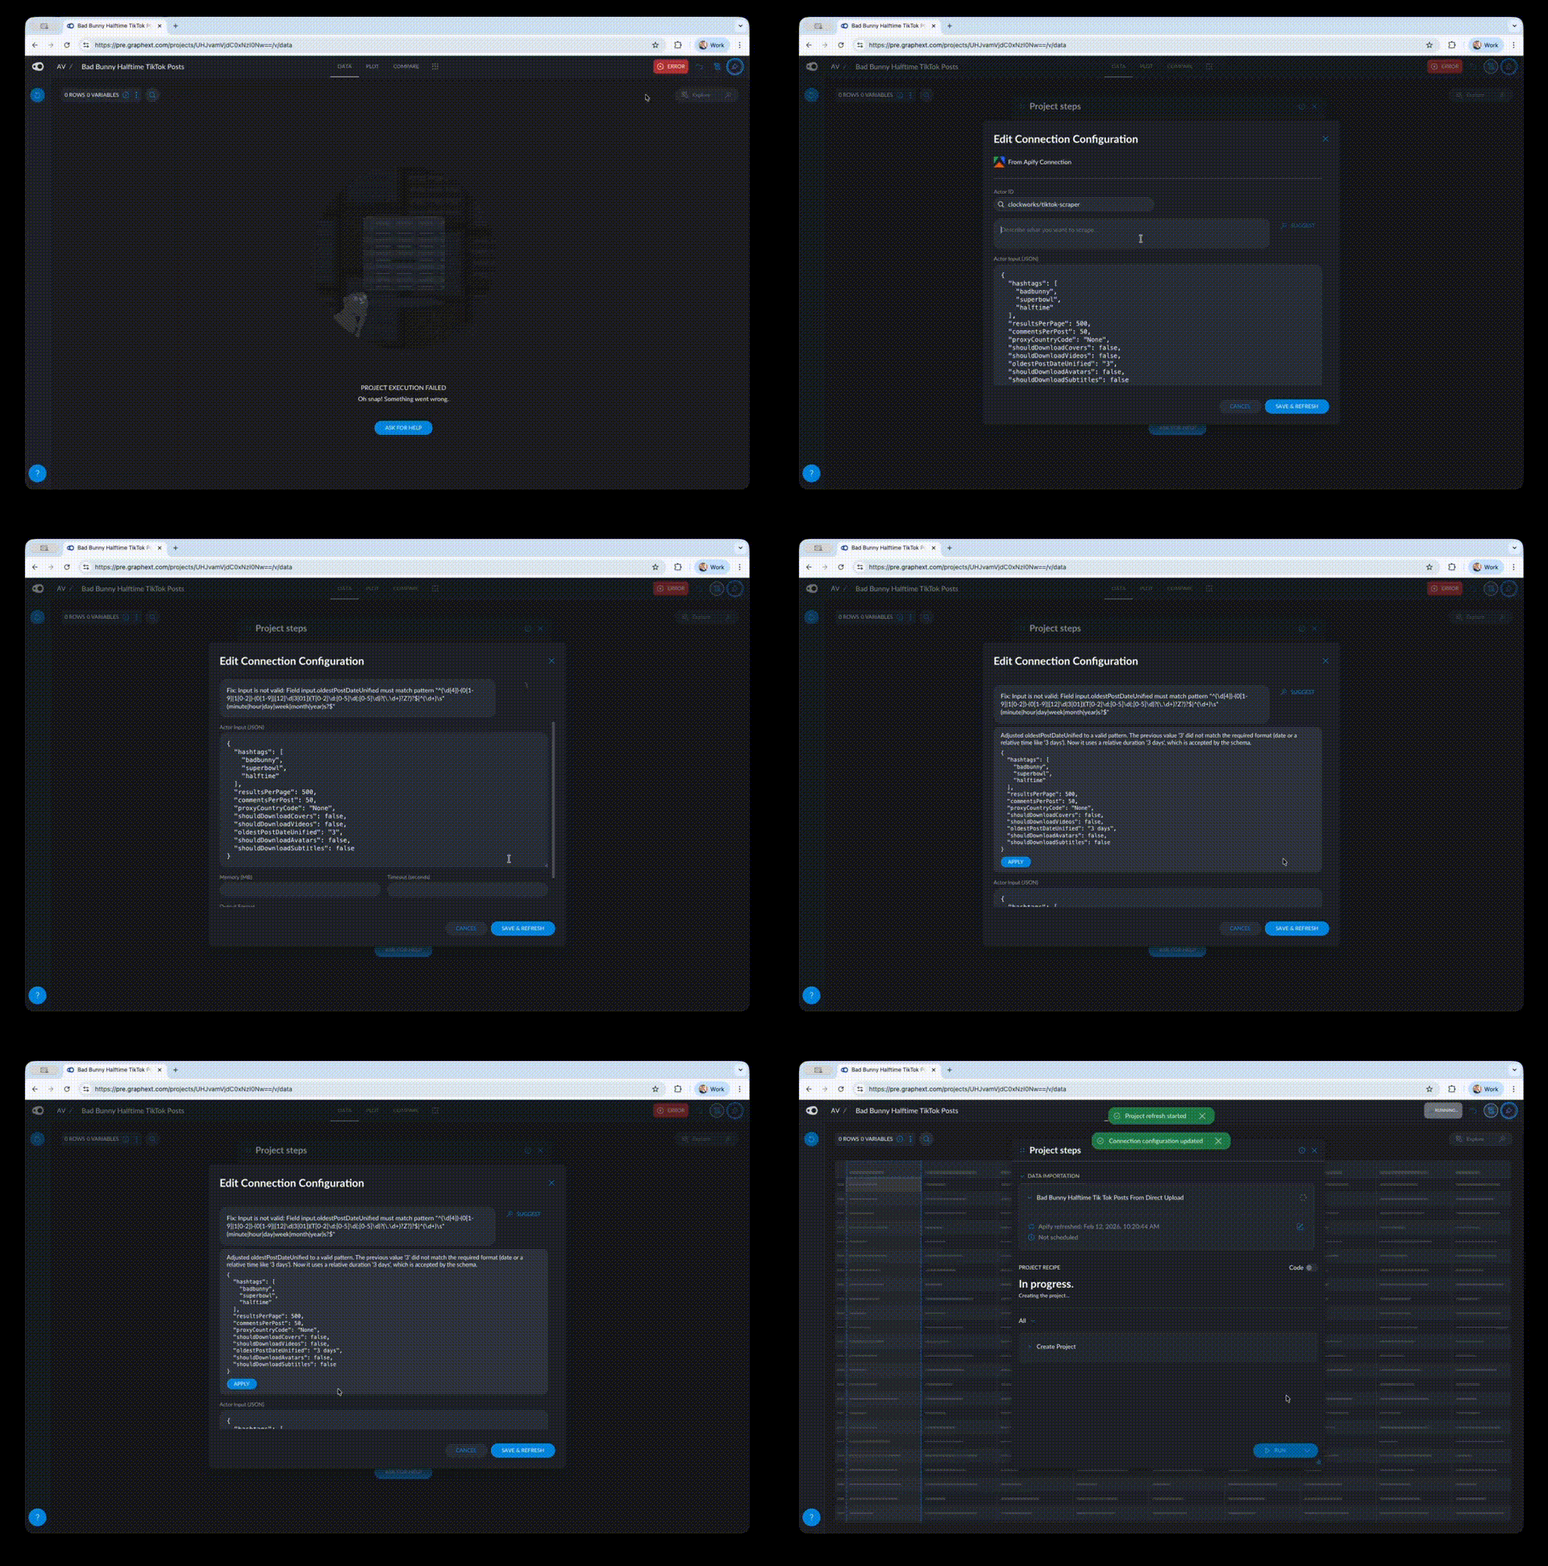
  • Edit Failed Integrations Inline. When a data import fails — wrong parameters, expired token, rate limit hit — you no longer need to delete the project and start again. The execution view now shows error details inline. Click the edit button, fix the configuration right there, and hit Save & Refresh to re-run the import with the corrected settings.

How can I start using it?

  • Open a project where the data import has failed
  • In the execution view, expand the import step to see the error details
  • Click the pencil icon to edit the integration configuration
  • Fix the issue and click Save & Refresh

July 22, 2025

2025-07-22

July 8, 2025

2025-07-08

June 24, 2025

2025-06-24

Page 1Next